
GRLife Pro v1.38: stronger CineStill halation with its own strength, and textures in RAW development
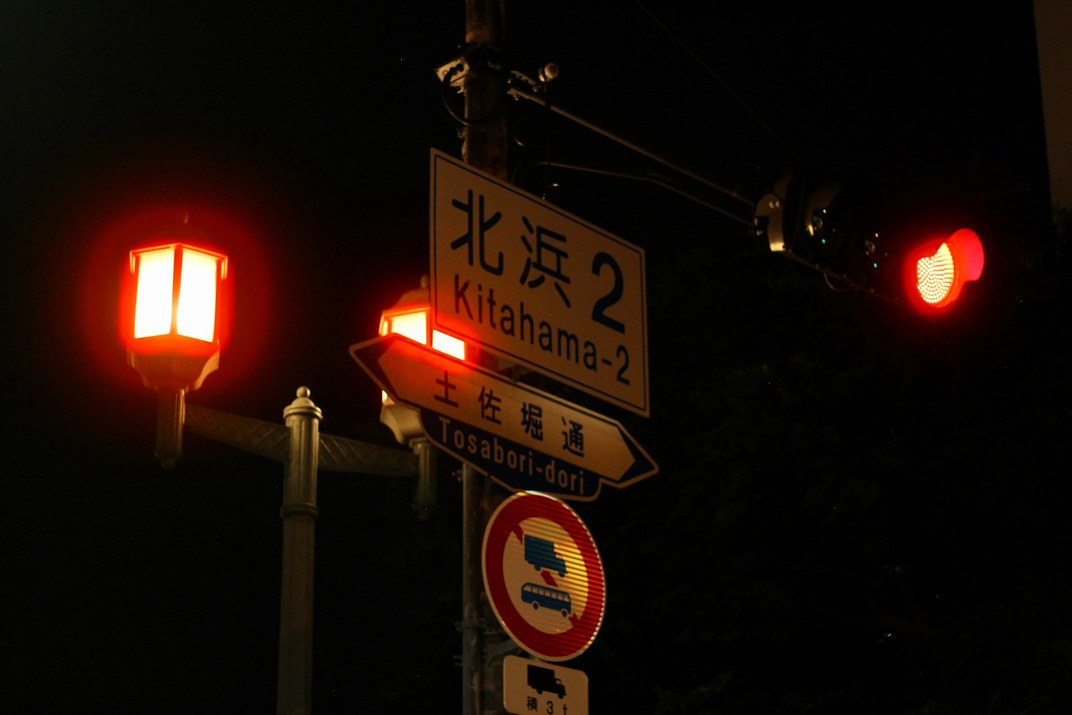
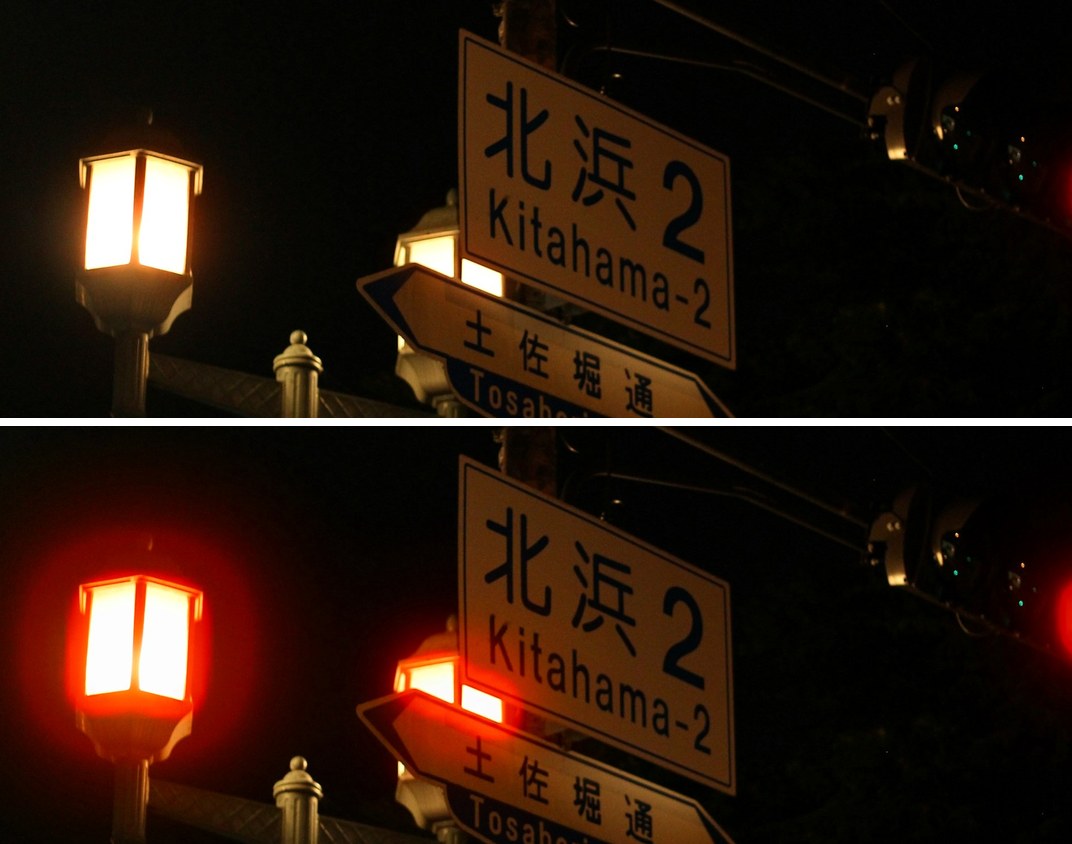
The red halation of the CS films is new. The JPEG the camera works on is already clipped where lights blow out, so a small lamp carried almost no light into the effect and its glow was faint. v1.38 gives a blown-out light back the energy the JPEG lost: a clear red inner ring and an orange outer glow around it, the light itself still white, more in the dark and less on bright areas.
What’s new
- CineStill halation is rebuilt: blown-out lights get their energy back, so even small street lamps and traffic lights show a clear red inner ring and an orange outer glow.
- MENU → GRLife Pro → Film texture has a fourth row, CineStill Halation: off, low, medium or high, kept for each film, medium by default; a dash for films that are not CS.
- In the playback menu’s RAW development, Fn on a film bay film adjusts grain, HDF diffusion, film softness, CS halation and the imprint for this development alone, leaving your shooting settings as they are.
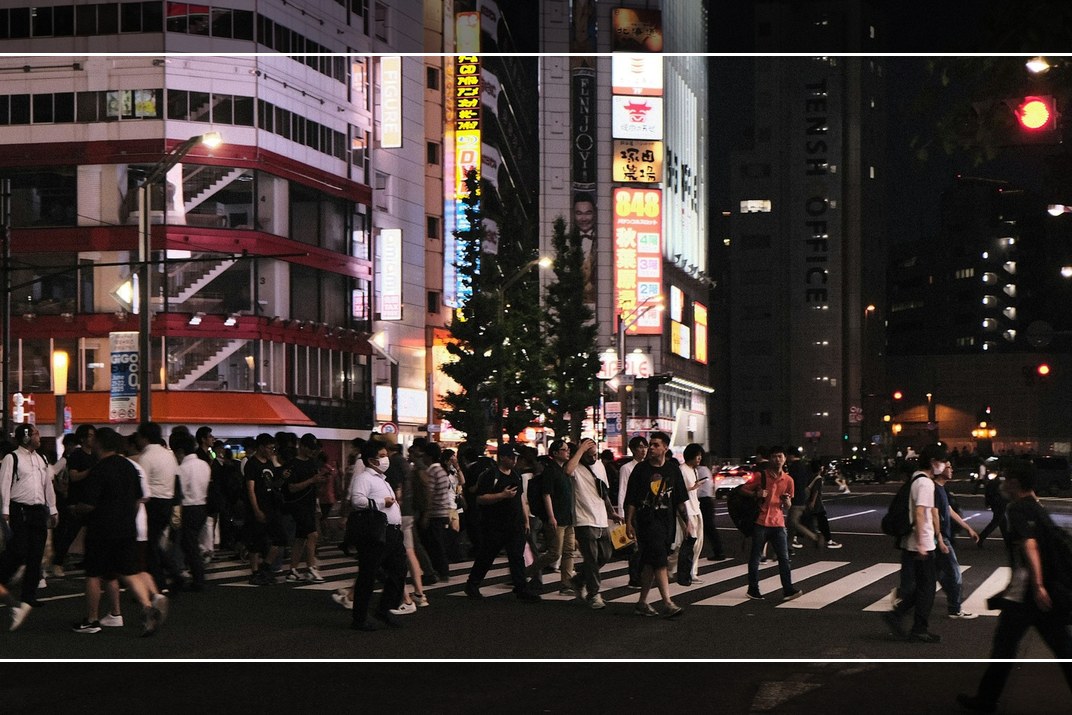
- Aspect 1.7: with 16:9, 5:4, 7:6 and full-width 65:24, the area outside the frame is half-transparent black with a white edge, so you see what lies beyond it; 4:3 and 1:1 keep the stock black bars.
Before and after
The same photo: v1.37 above, v1.38 high below.
Low, medium, high
Film texture → CineStill Halation, left to right: low, medium, high.

RAW development: Fn sets this development’s textures
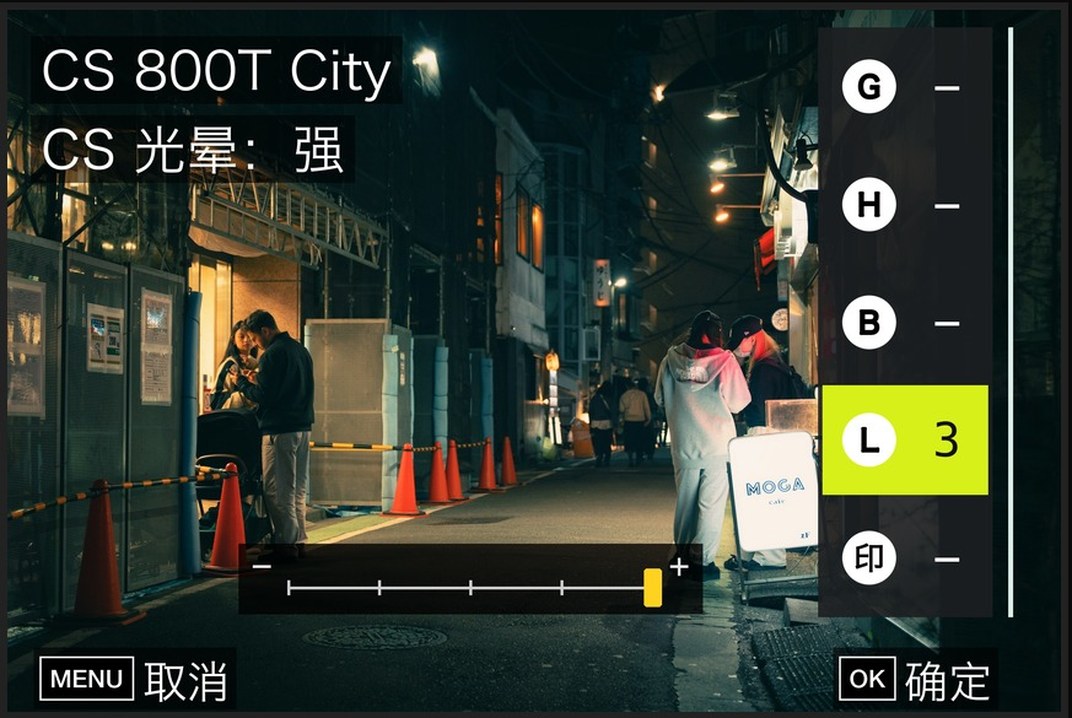
Playback → MENU → RAW development → Image Control: with the cursor on a film bay film the footer shows “Fn ⚙”; Fn opens the page, as for a stock effect’s fine-tuning. Five rows: G grain, H HDF diffusion, B film softness, L CS halation, 印 imprint; “-” follows the film, 0–3 are off, low, medium, high. ▲▼ pick a row, ◀▶ change it, OK keeps, MENU cancels. It holds for this development of this photo only; the preview shows the film’s colour, the textures appear in the saved JPEG.
Live view mask: half-transparent with a white edge
16:9 in live view: half-transparent outside the frame, with a white line along its edge. 5:4, 7:6 and 65:24 look the same.
How to upgrade
- Generate a new firmware in the firmware store and install it as before.
- Open MENU → GRLife Pro → Info: when the second line reads v1.38 you are on the new version.
- With a CS film in a position, pick the strength under GRLife Pro → Film texture → CineStill Halation.
Good to know
- The halation works on CS films only and shows in the photo, not in live view; after the upgrade it is medium, clearly stronger than before.
- Supports GR IIIx 1.60 / 1.70 and GR III 2.10 / 2.20; confirmed on a GR IIIx with 1.70.
- Installing unofficial firmware carries risk: keep the stock firmware so you can go back.
This post was first sent by email to GRLife users. To get the next one, sign in and turn on email notifications in Account settings.