
GRLife Pro 2.x guide
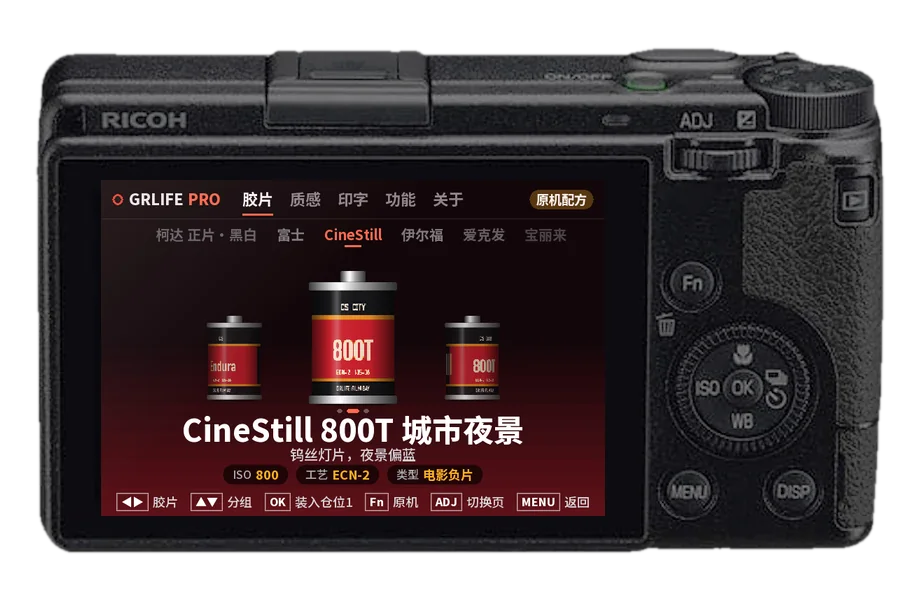
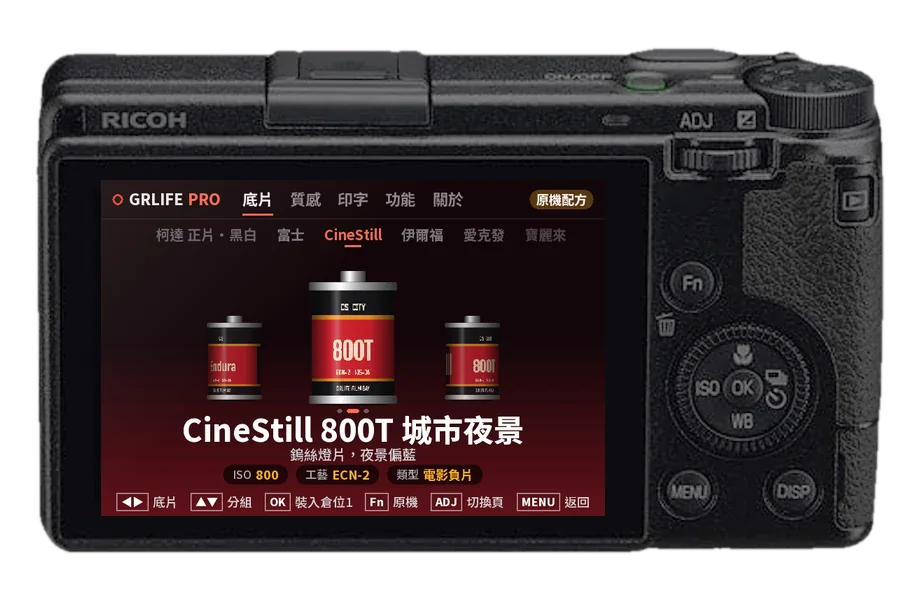
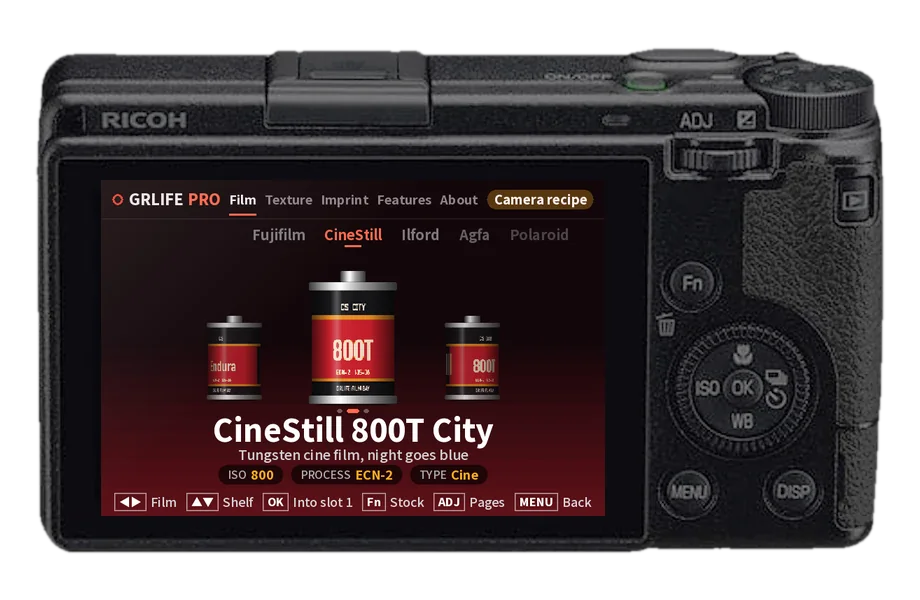
GRLife Pro 2.x puts films, texture, imprint and every feature into one screen inside the camera: press OK on the shooting screen to open it and use the camera’s buttons. This page covers getting it, installing it, first use, and what each of its five pages does.
What is new in 2.x
One firmware, every feature
You no longer pick features on the website. The film library (films, texture, imprint), shutdown screen, HDR photos, more aspect ratios, half frame, golden ratio guides, slider level, ADJ nine settings and rear dial ISO are all built in and switched on or off in the camera.
One in-camera app
Press OK on the shooting screen to open GRLife Pro. It has five pages: Film, Texture, Imprint, Features and About. It follows the camera’s menu language: Simplified Chinese, Traditional Chinese or English; any other menu language shows English.
Films go into position 1
Pick a film on the film page and press OK: it goes into film position 1 and is the film you shoot with; to go back to the camera’s own recipe, press Fn on the film page. All five positions are still there: MENU › GRLife Pro › Change film gives each one its film, and ADJ still switches between them.
The app lives on the card
The app is GRLIFE/GRLPRO.GRP on the SD card, and the camera keeps its own copy. To update the app later you replace this file, usually without flashing the firmware again.
For the GR III (2.10 / 2.20 / 2.21) and GR IIIx (1.60 / 1.70 / 1.71); the GR IV (1.20 / 1.21) is in Beta and some features differ. Still on v1.4x firmware? That’s fine: the old firmware page and the v1.4x steps in the other guides are still there.
Get the firmware
All of these steps happen on the GRLife Pro 2.x custom firmware page. Files are processed only in your browser and never uploaded.
-
Choose a model
Choose GR III or GR IIIx. The firmware version is detected when you import the official BIN.
-
Contents and recipes
The page lists every feature built into 2.x; there is nothing to tick. Recipes are an optional step: set them up here if you want your own recipes in Image Control, or skip it.
-
Import factory firmware
Import the official BIN downloaded from Ricoh’s website; its version is checked on this device. Keep a copy of the official BIN so you can flash back later.
-
Build and download
After reading and accepting the disclaimer and terms of use, build and download the ZIP on this device.
| Files in the ZIP | Purpose |
|---|---|
| The BIN file in the SD folder | The custom firmware: copy it to the root of the SD card and flash it. |
SD/GRLIFE/GRLPRO.GRP | The GRLife Pro 2.x in-camera app. |
SD/GRLIFE/FILMS.GRF | The film library file, with only the five built-in films.If your camera has the film library, download its own file on the film library page. |
| README | Installation instructions. |
Install
-
Reset the camera first
On the camera, press MENU and run Reset to return the settings to factory values. Settings you changed are cleared, so note them down first if you need them.
-
Flash the firmware
Copy the BIN file from the SD folder to the root of the SD card, without renaming it or putting it in a folder. Insert a fully charged battery, hold MENU while turning the camera on, and confirm when asked. Do not turn the camera off or remove the battery or card until the update finishes.
-
Copy the GRLIFE folder
- No GRLIFE folder on the card yet: copy the whole GRLIFE folder from the SD folder to the root of the SD card.
- The card already has a GRLIFE folder: copy only GRLPRO.GRP into it. Do not replace the whole folder; the camera keeps other files in it.
-
Keep your own film library
If the card already has a FILMS.GRF (films you bought, or your own LUT films), do not replace it with the FILMS.GRF from the ZIP: that one holds only the five built-in films.
Preparation before flashing and how to flash back the official firmware are in the custom firmware guide.
Read the custom firmware guideFirst use
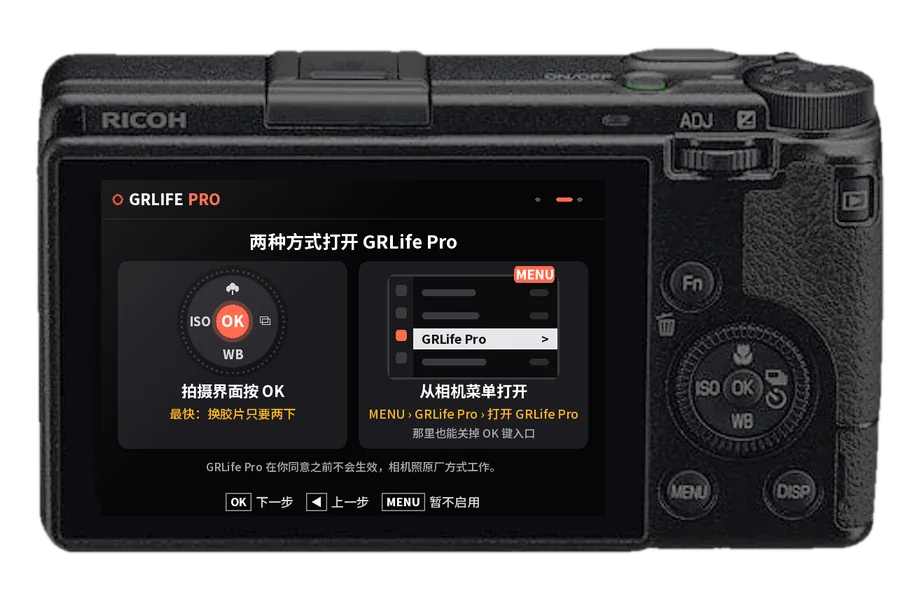
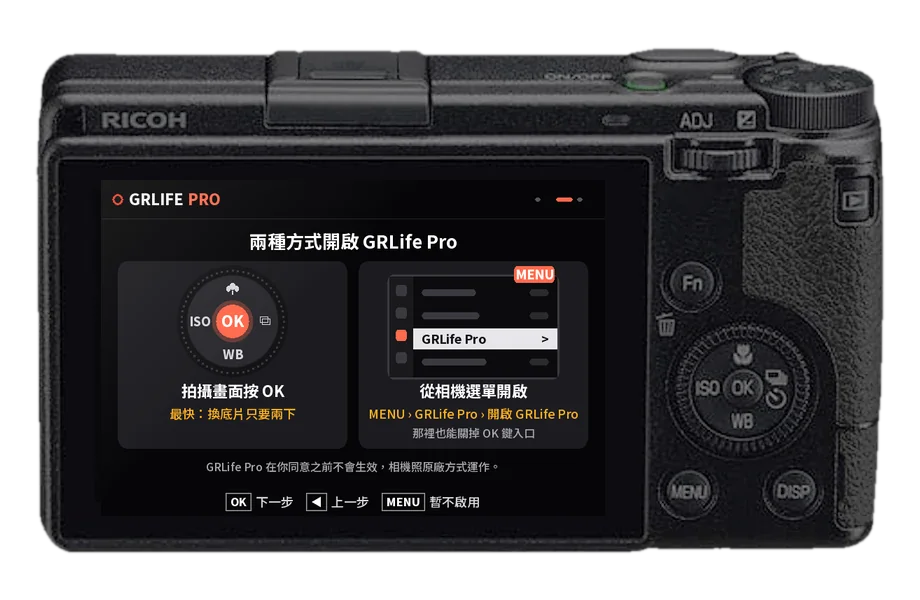
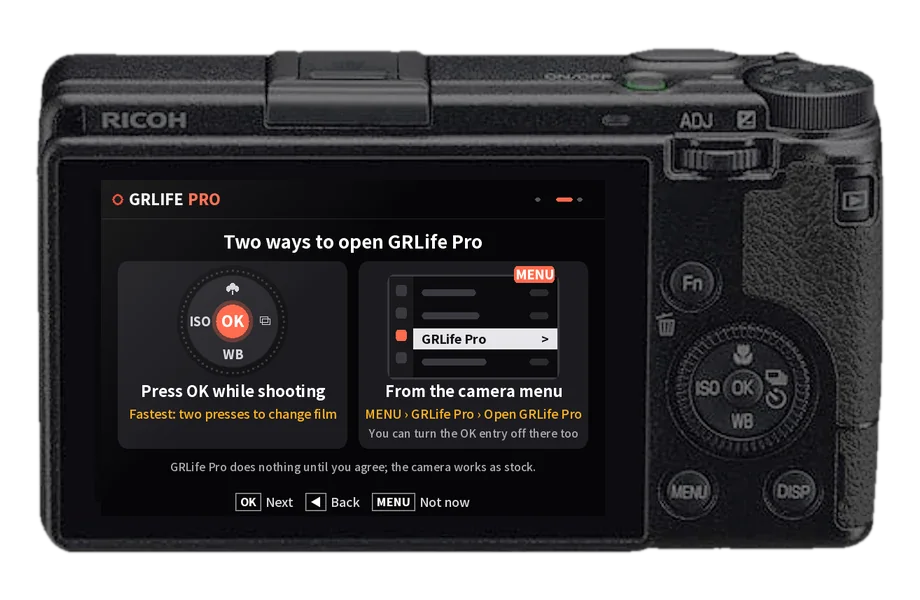
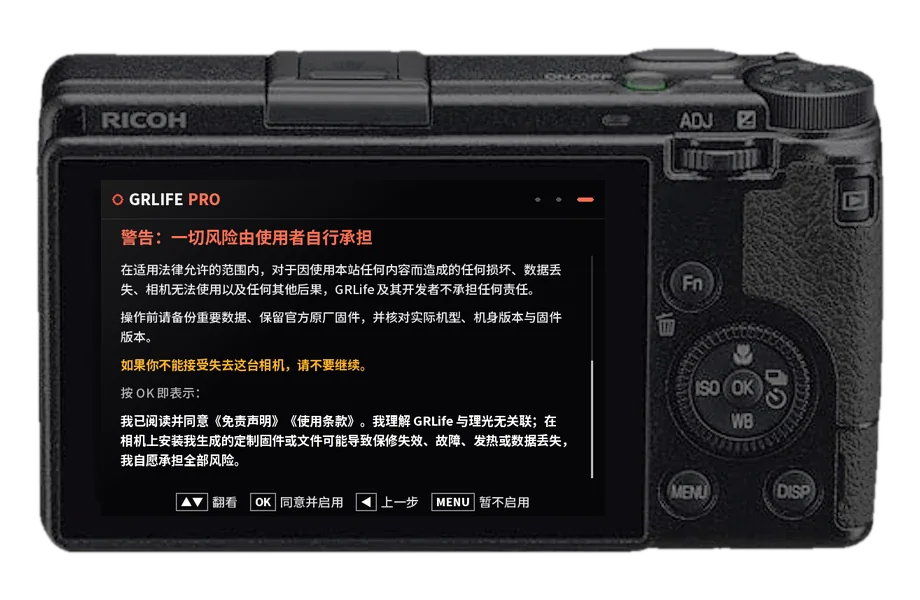
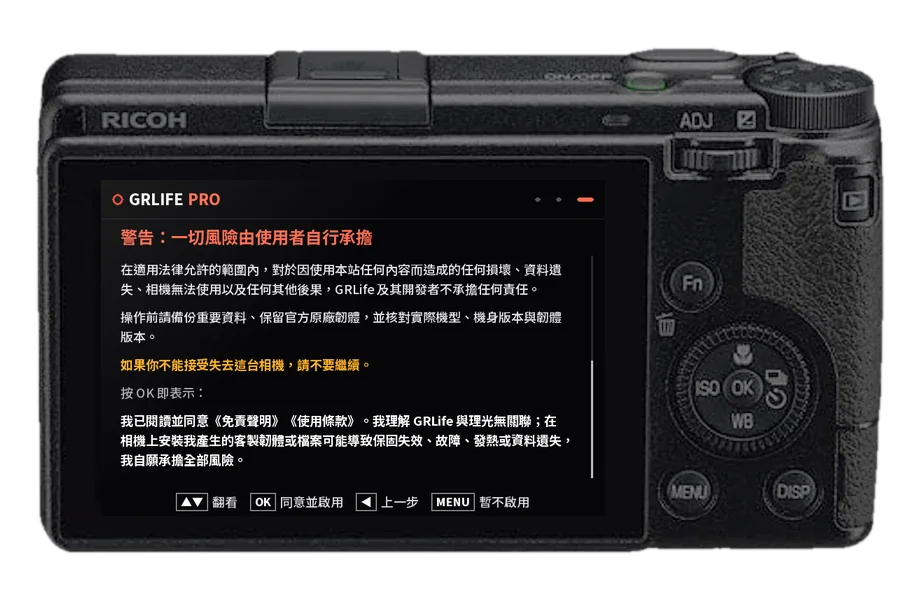
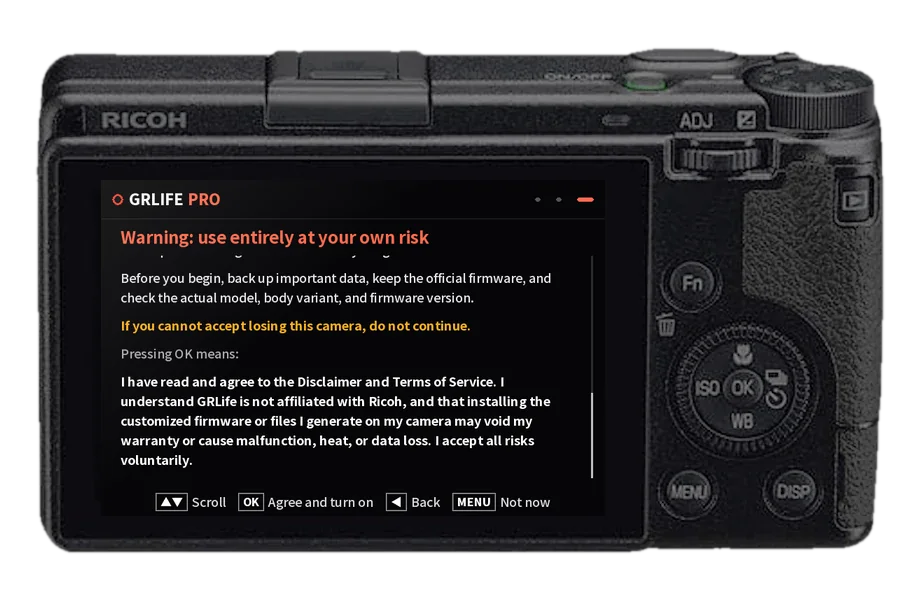
Turn the camera on with the card in and press OK on the shooting screen: the first-use guide appears. Until you accept the disclaimer, GRLife Pro does nothing and the camera works as stock.
-
Welcome
The first page welcomes you; press OK for Next. If you press MENU for “Not now”, the guide appears again the next time you turn the camera on.
-
Two ways to open it
Press OK on the shooting screen, or choose GRLife Pro › Open GRLife Pro in the camera MENU. You can also turn the OK entry off there.
-
Disclaimer
Scroll with ▲▼ to the end before you can agree. Then press OK for “Agree and turn on”.
-
Works without the card
Once you agree, the camera keeps its own copy of the app and the film library. Removing or swapping the card afterwards does not matter.
Buttons
The bottom line of the screen always shows the buttons you can use on the current page.
| Buttons | What it does |
|---|---|
| ADJ left / right | Switches pages. |
| ◀ ▶ | Film page: changes the film. Other pages: changes the current item. |
| ▲ ▼ | Film page: changes the shelf. Other pages: moves up and down. |
| OK | Film page: loads the film and returns to shooting. Other pages: turns the current item on or off, or opens it. |
| Fn | Film page: back to the camera’s own recipe. Other pages: resets the page to its defaults. |
| MENU / half-press | Back / straight back to shooting. |
The five pages
-
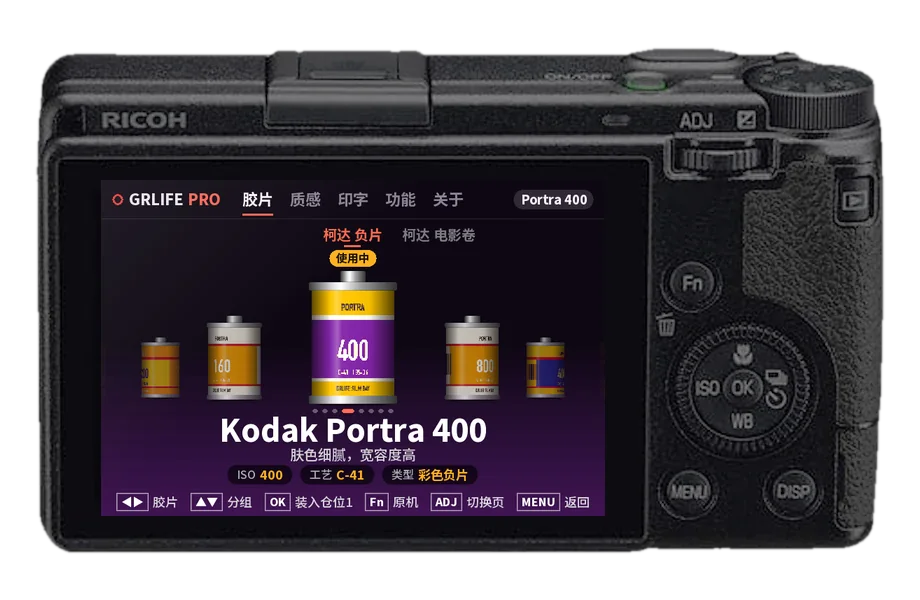
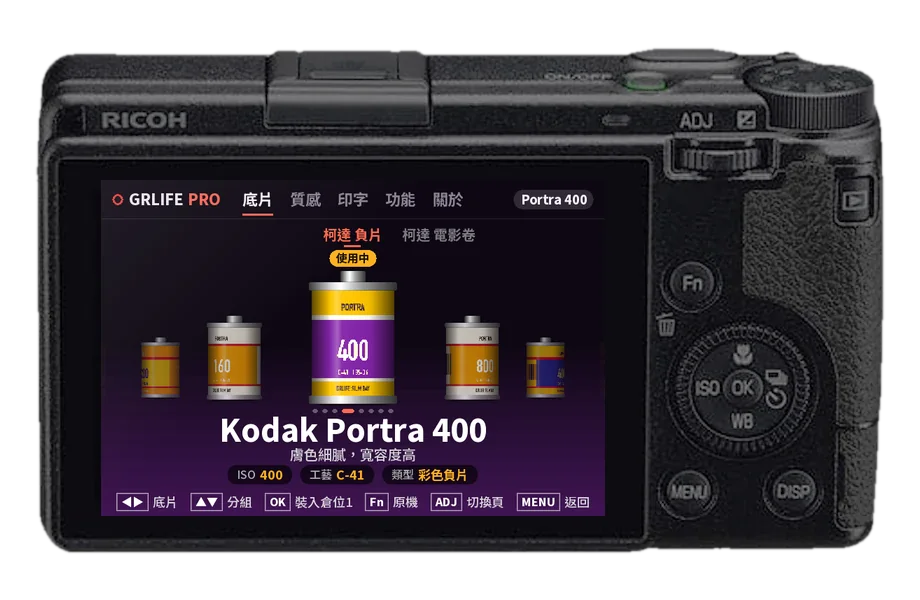
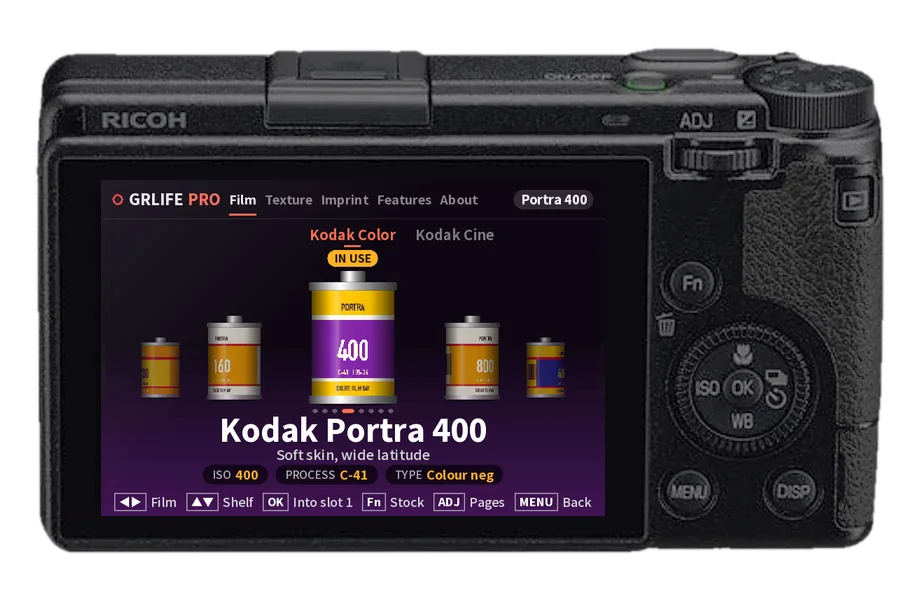
Film
Film canisters on a shelf: ◀▶ picks a film, ▲▼ changes the shelf, OK loads it and returns to shooting, Fn goes back to the camera’s own recipe. The top right corner shows the film in use.
Films sit on 13 shelves by brand: Kodak Color, Kodak Cine, Kodak Slide & B&W, Fujifilm, CineStill, Ilford, Agfa, Polaroid, Hasselblad, Pentax, Leica, Ricoh and Creative. Names are the makers’ full names, such as Kodak Portra 400 or CineStill 800T City.
-
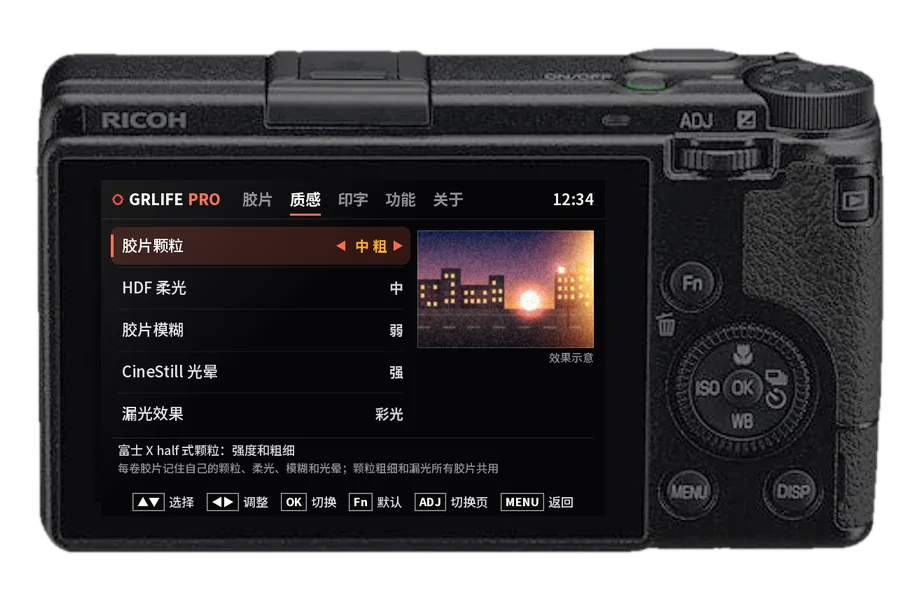
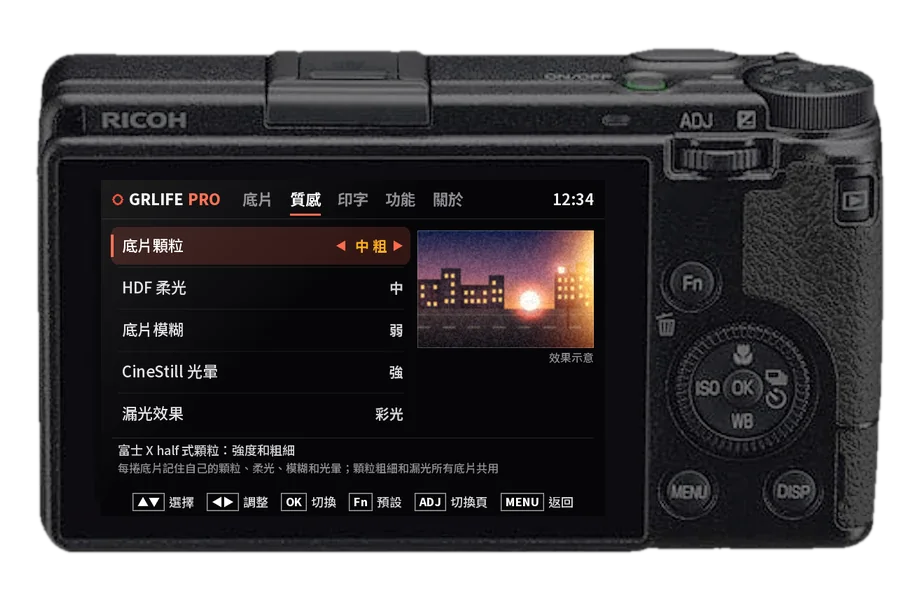
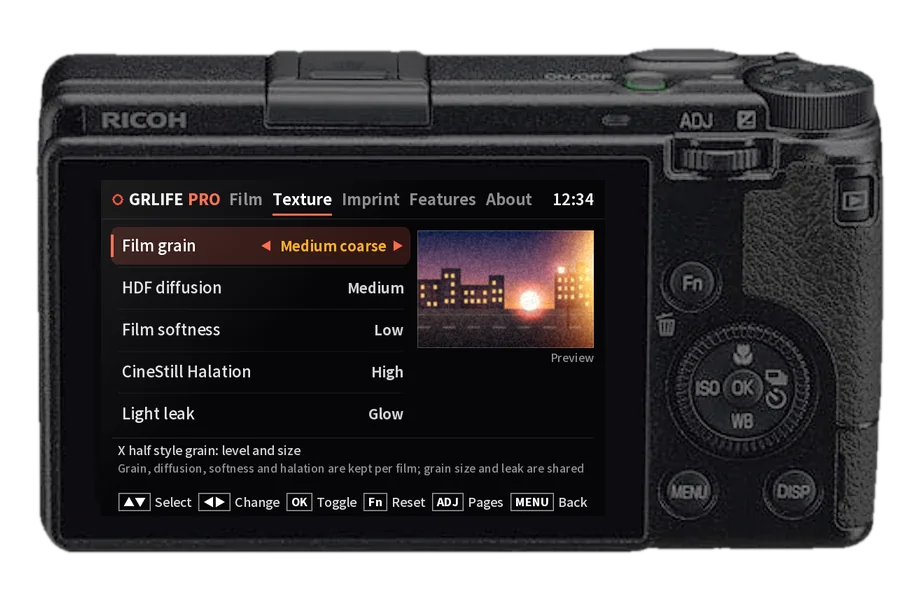
Texture
Film grain (X half style, with level and size), HDF diffusion, film softness, CineStill halation and light leak (Glow or First roll). The preview on the right is a sketch, not the camera’s actual processing.
Grain, diffusion, softness and halation are kept per film; grain size and light leak are shared by all films. CineStill halation works only on CineStill films.
-
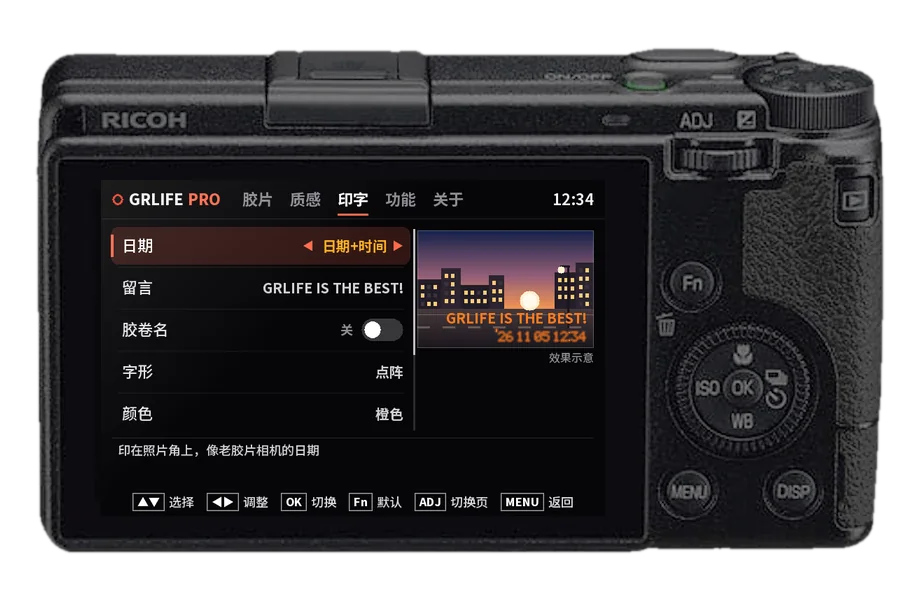
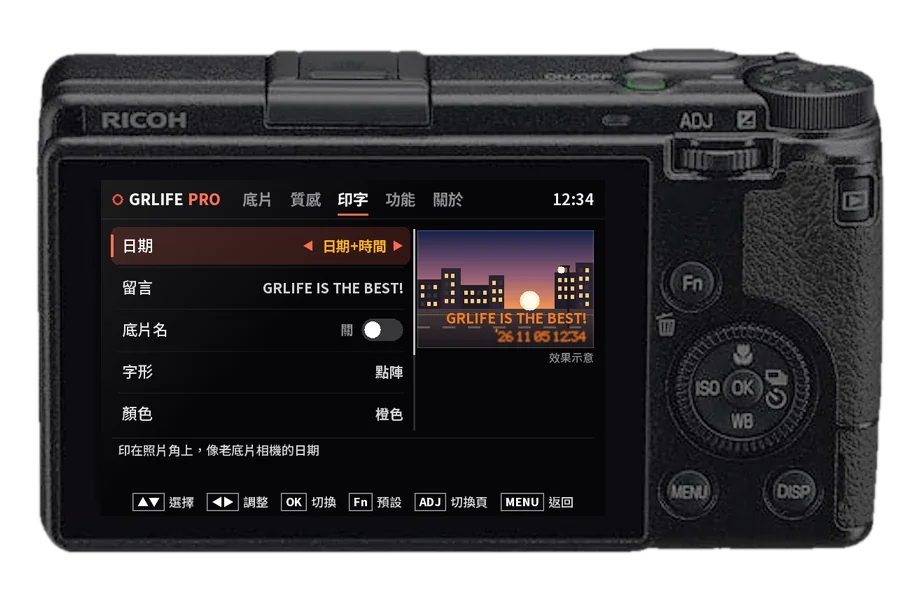
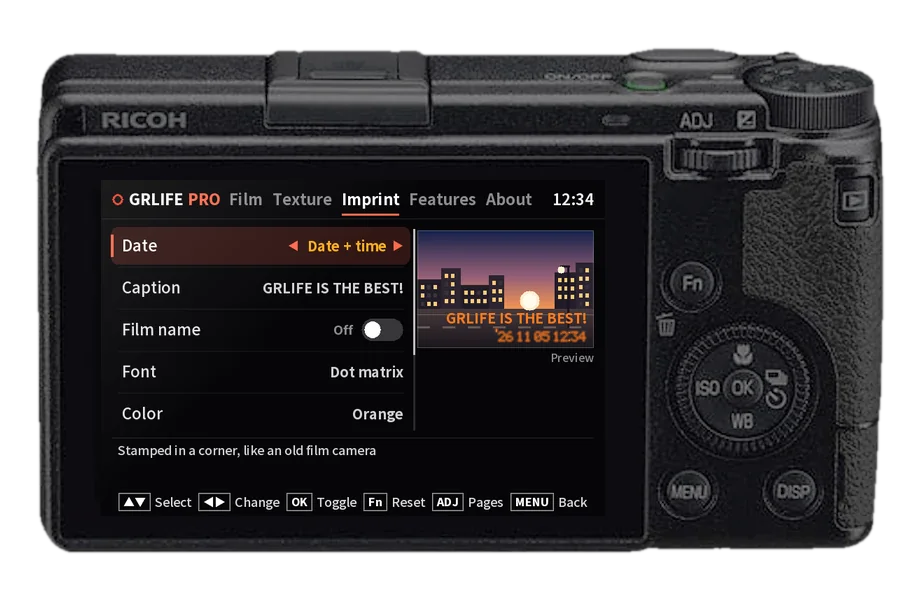
Imprint
Stamps the date in a corner of the photo, like an old film camera. Choose the date format, add a caption (12 presets, or your own typed on the camera’s keyboard), print the film name too, and pick the font, colour, glow, corner and size.
-
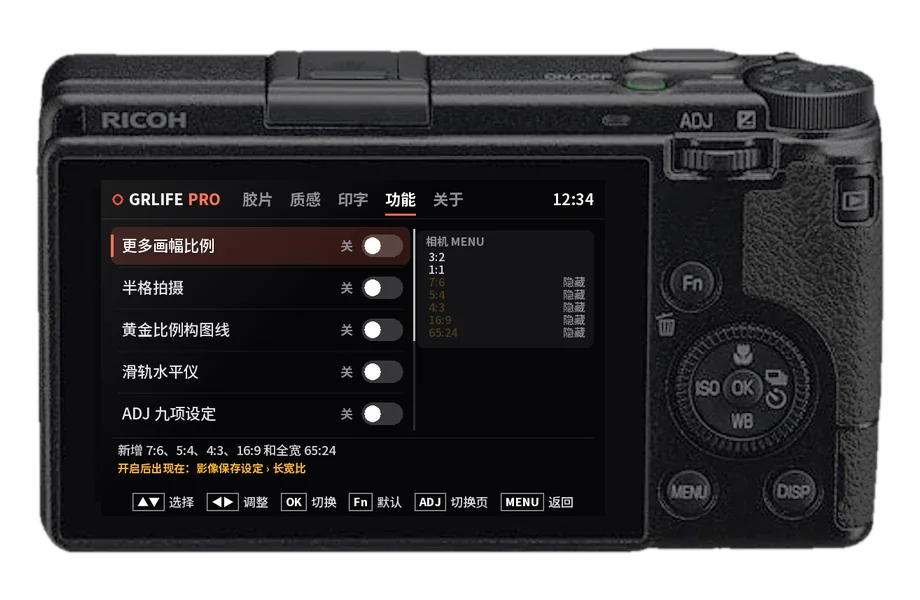
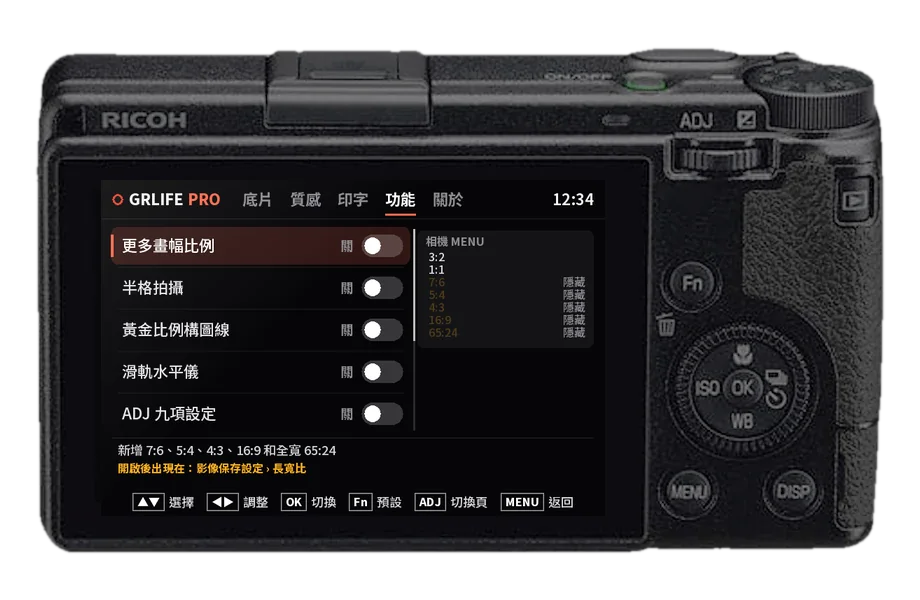
Features
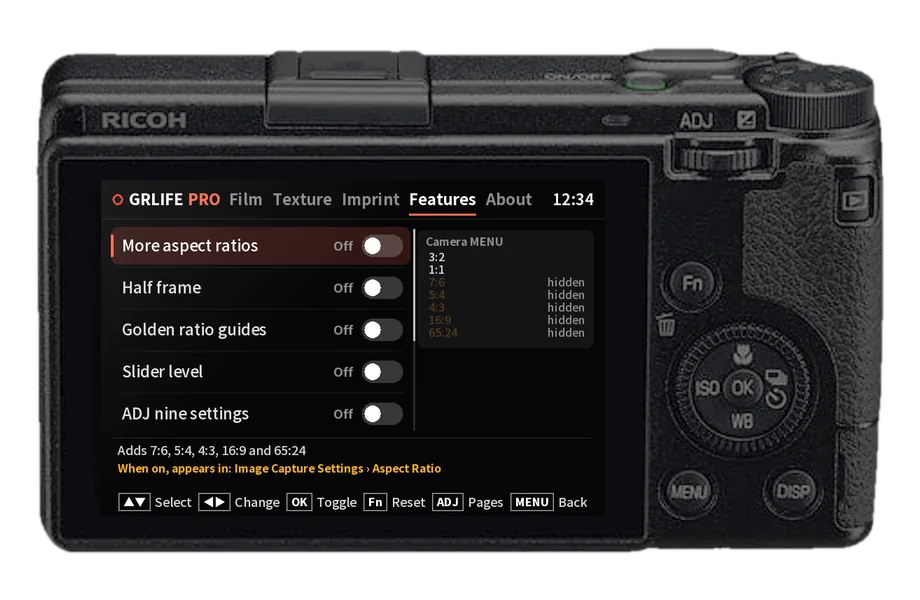
A switch for each feature: more aspect ratios, half frame, golden ratio guides, slider level, ADJ nine settings, rear dial ISO, live photos, HDR photos and shutdown screen.
All start switched off. Only when you turn one on do its options appear in the camera’s own menus; each item says where, for example more aspect ratios appear in Image Capture Settings › Aspect Ratio.
-
About
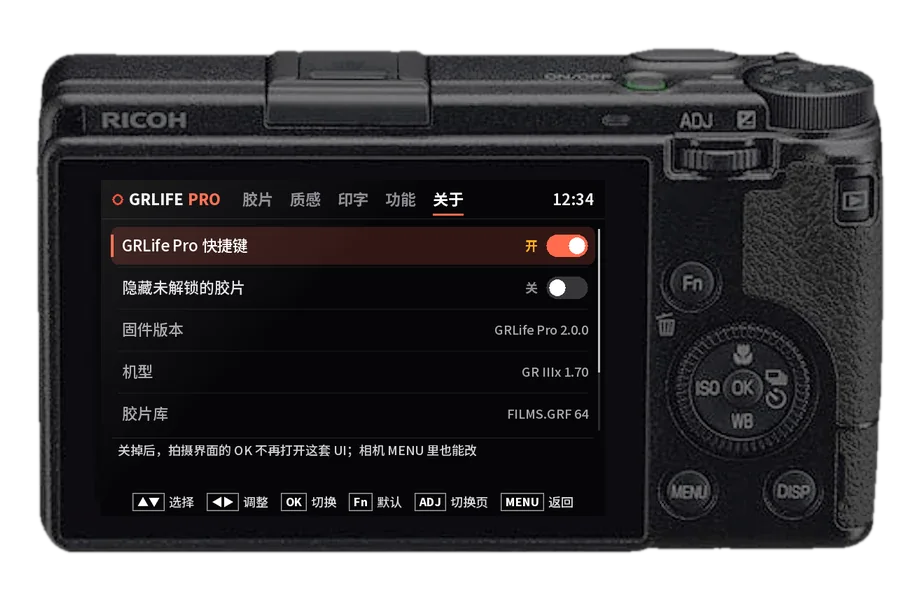
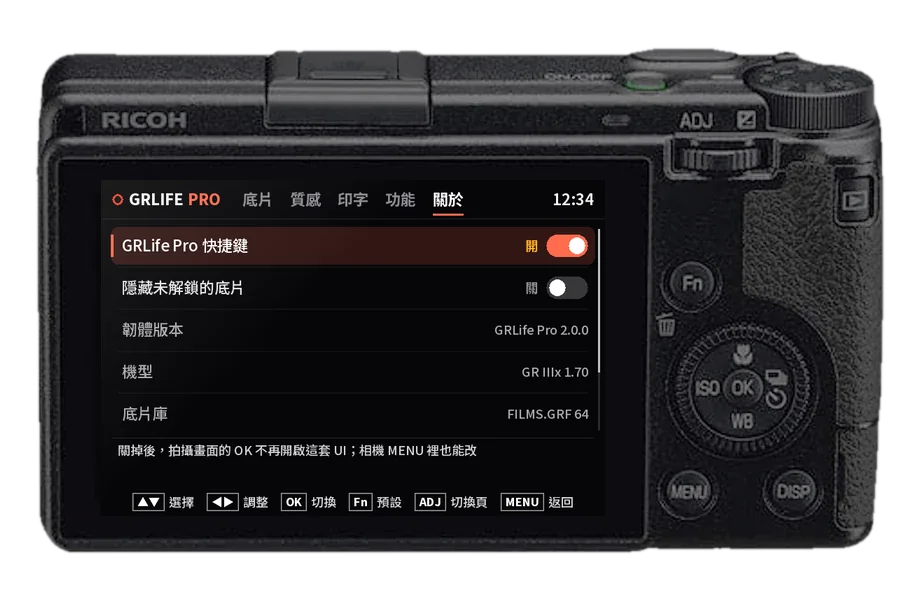
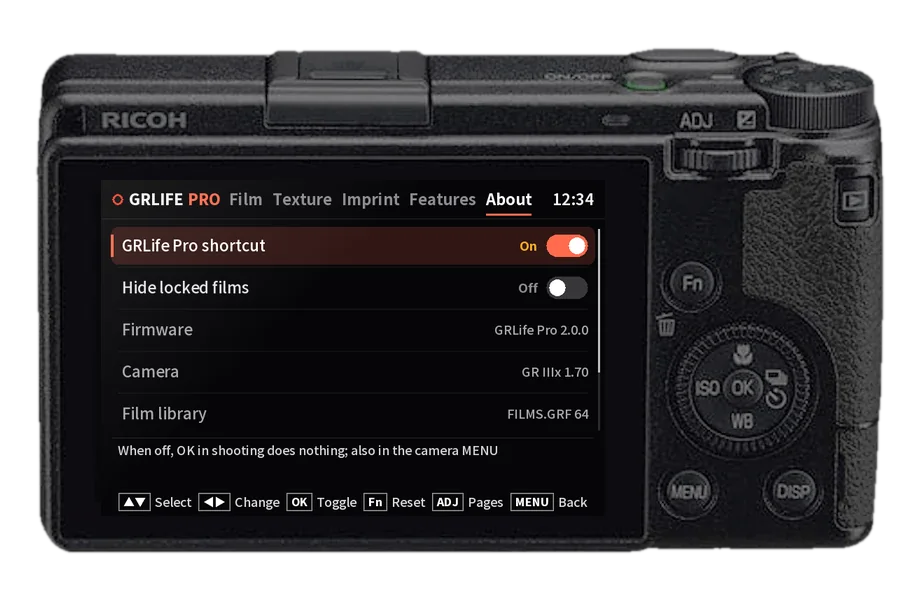
The “GRLife Pro shortcut” and “Hide locked films” switches, plus the firmware version, camera, film library file, body code and “Clear GRLife data”.
With “GRLife Pro shortcut” off, OK on the shooting screen no longer opens the app; open it from the camera MENU instead.
Upgrading from v1.4x
- In 2.x every feature starts switched off. Things you used before, such as 16:9 and other aspect ratios, half frame or HDR photos, are off after the upgrade; turn them on again on the Features page.
- Changing films, Info and the shutdown screen, which were under MENU › GRLife Pro in the old firmware, are now in the GRLife Pro app: change films on the Film page, find the body code on the About page and the shutdown screen on the Features page.
- A film library you already have is not affected and does not need to be bought again. Just keep your own FILMS.GRF on the card.
Locked films and the body code
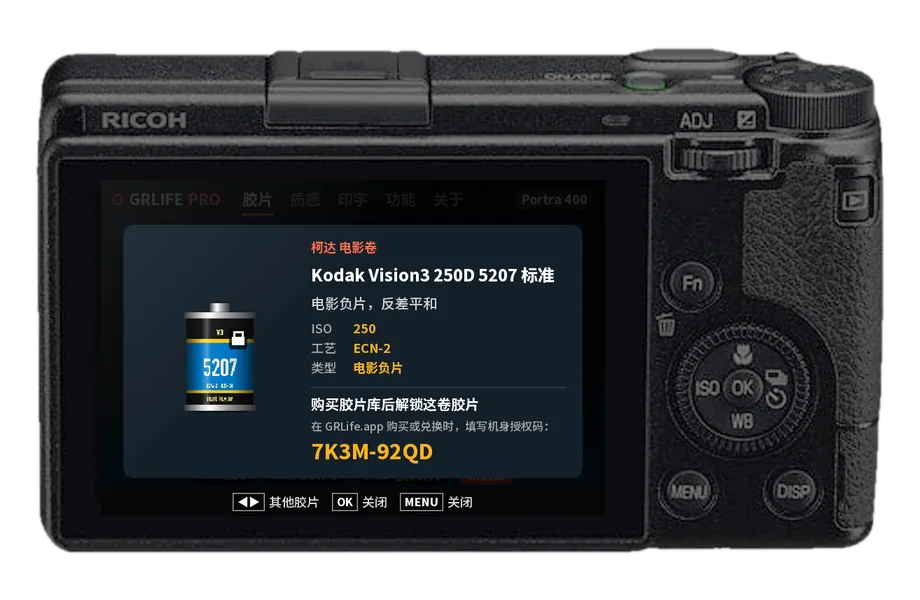
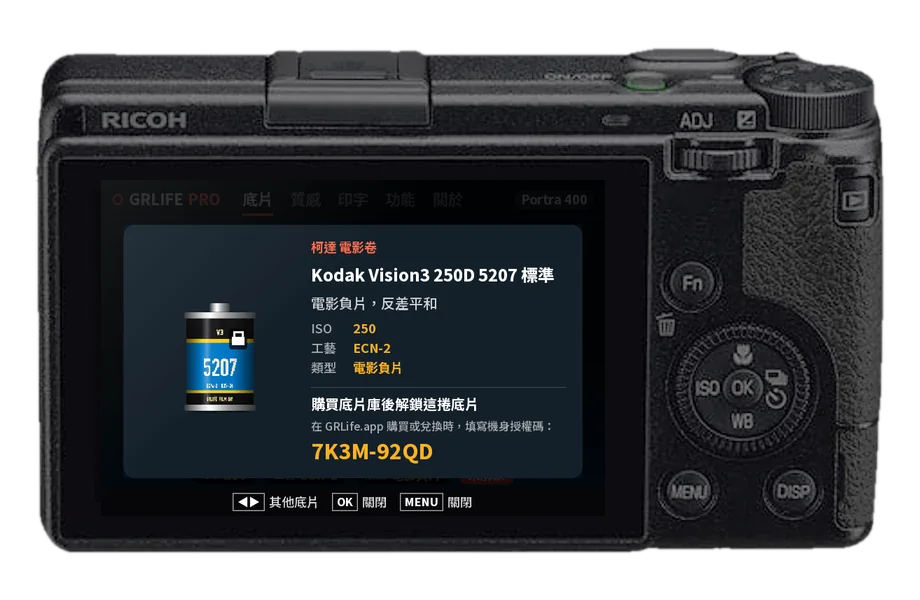
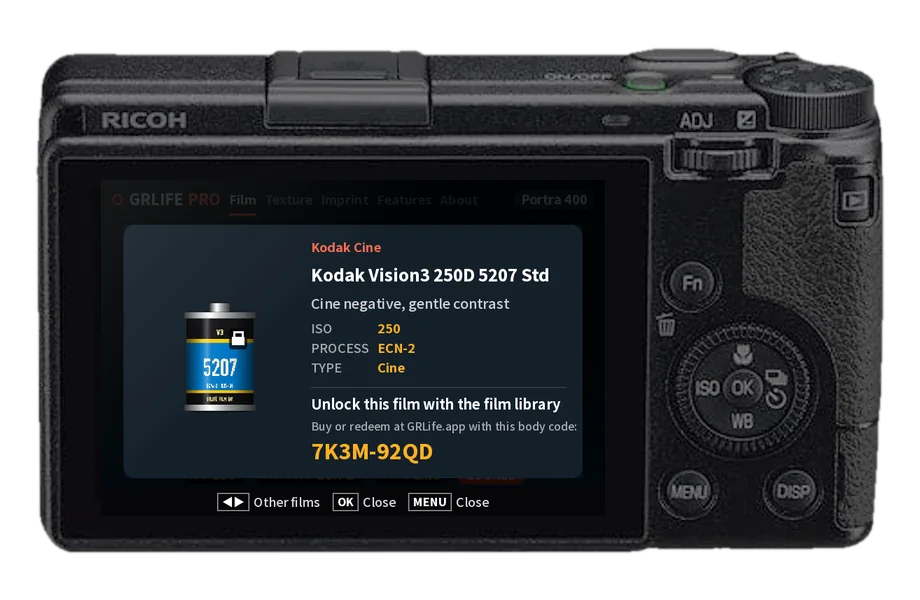
- The Film page lists every film in the film library. Films this camera does not have yet are grey with a lock; press OK on one to see a card with the film’s parameters and this camera’s body code.
- Buy or redeem with the body code on the film library page, download this camera’s film library file, replace the old FILMS.GRF in the card’s GRLIFE folder with the new one, and turn the camera on once with the card in: the locks are gone.
- To hide locked films, turn on “Hide locked films” on the About page (off by default); the Film page then shows only the films you can use.
My films
Once films made from your own LUT or colour chart are saved to your GRLife account, download a new FILMS.GRF from the film library (with “My films” ticked), put it on the card and turn the camera on once: they appear on the Film page in the “My films” shelf.
Read the “My films” guideShutdown image
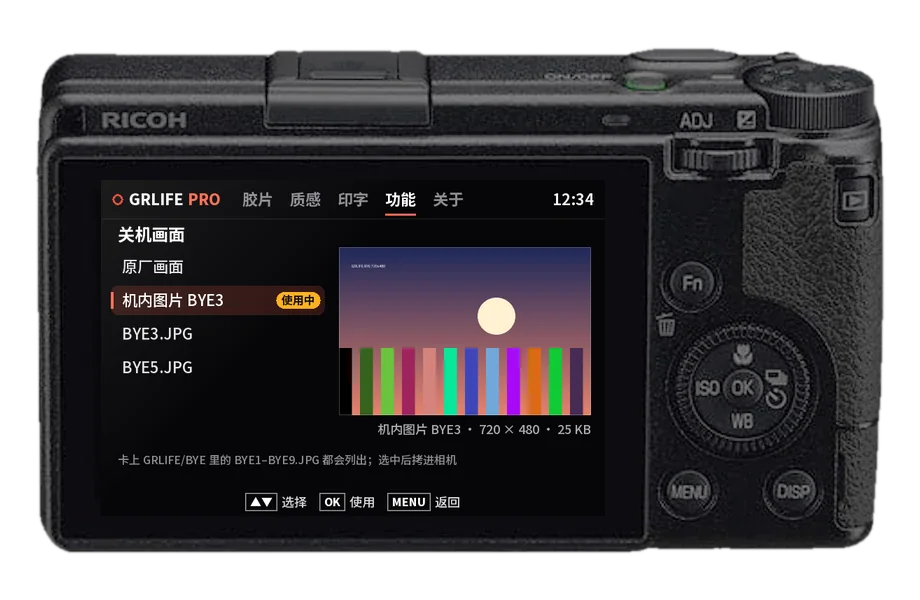
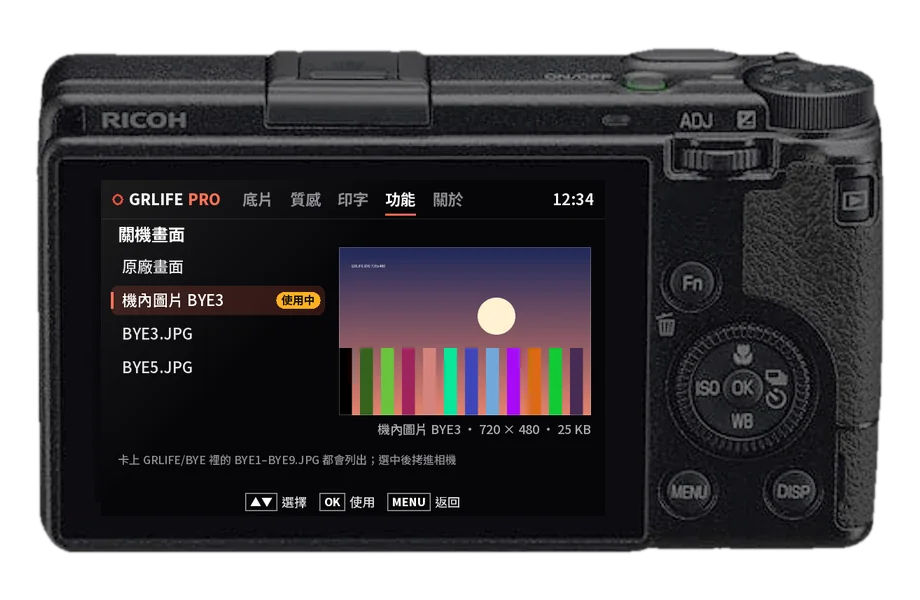
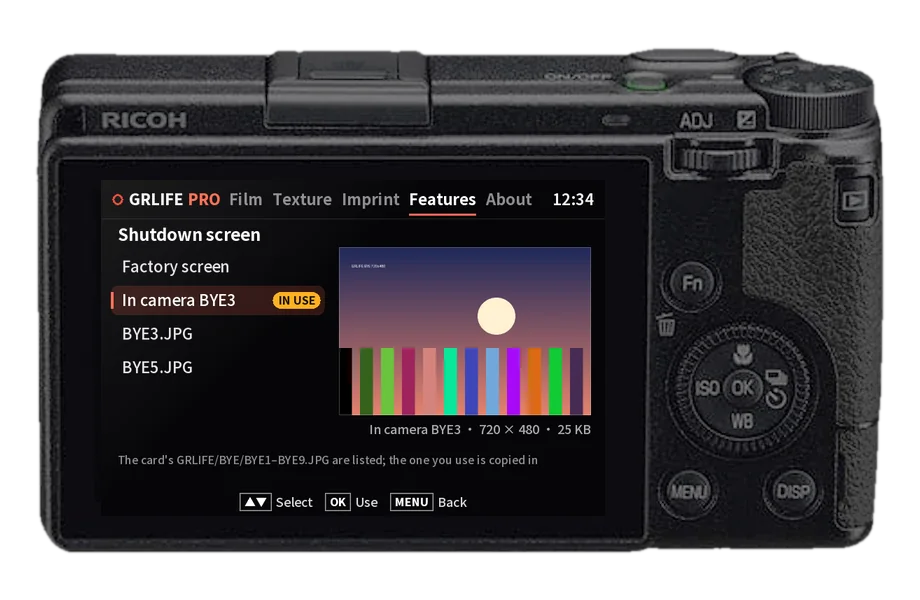
- On the Features page, select “Shutdown screen” and press OK to open it.
- The list shows the factory screen, the in-camera picture (the one saved in the camera) and BYE1–BYE9.JPG from the card’s GRLIFE/BYE folder; the selected picture is previewed on the right.
- Press OK on a picture to use it; it is copied into the camera and works without the card. Choose “Factory screen” to go back to the camera’s own screen.
- Make shutdown pictures with the shutdown screen tool; the steps are in the shutdown screen guide.
Updating the app
When a new version of GRLife Pro comes out, copy the new GRLPRO.GRP into the card’s GRLIFE folder over the old one and turn the camera on with the card in: the camera replaces its own copy by itself. Usually no new firmware flash is needed; the release notes say so when one is.
See the release notesClear GRLife data
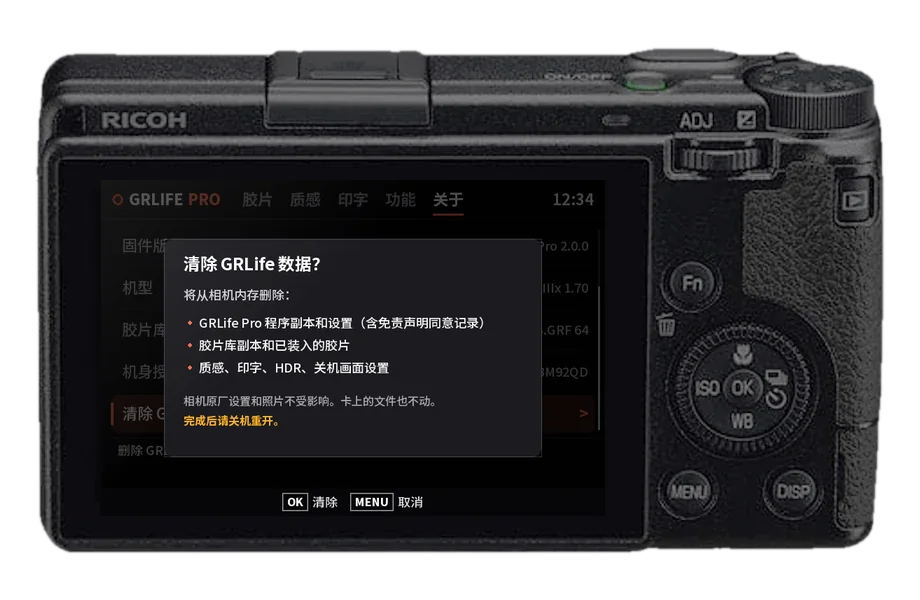
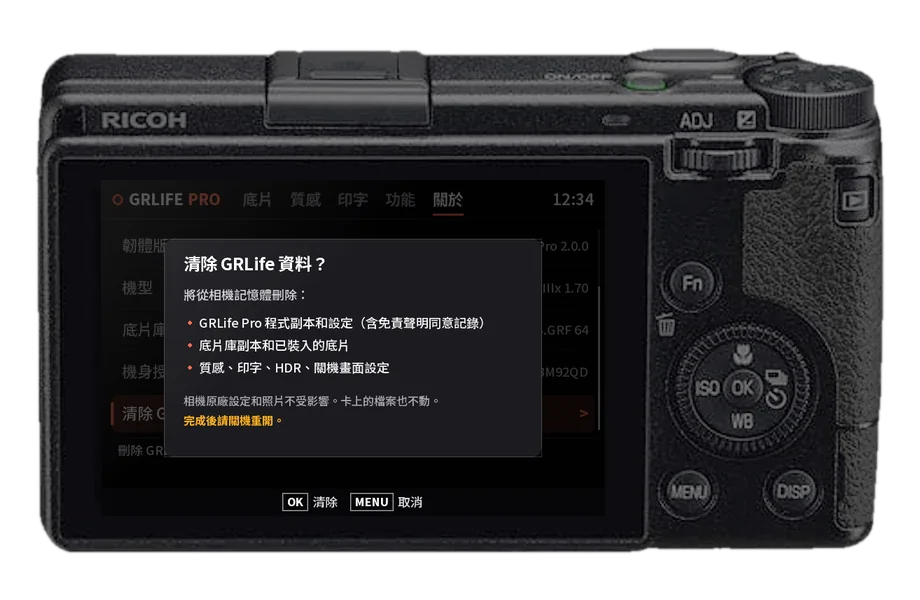
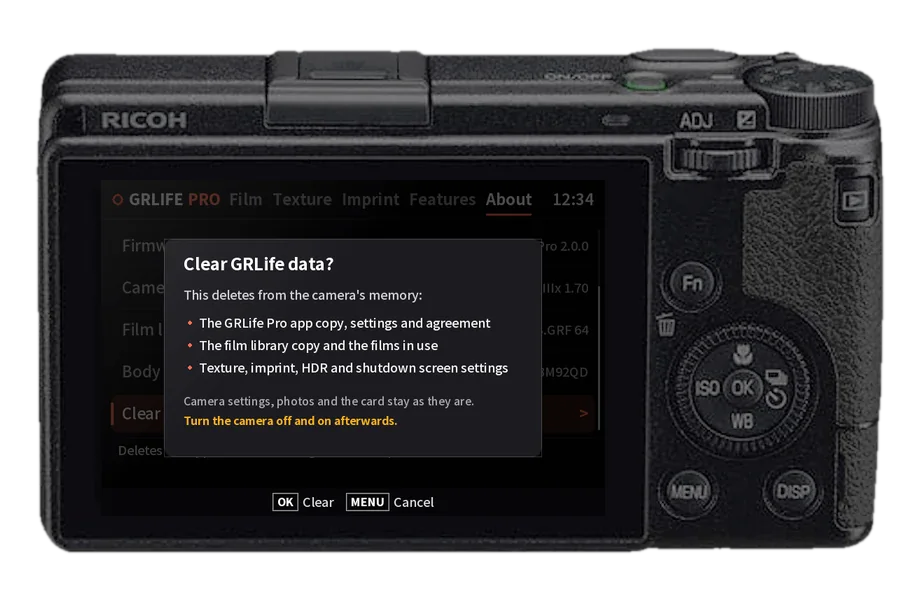
- Select “Clear GRLife data” at the bottom of the About page. After you confirm, it deletes what GRLife keeps in the camera’s memory: the app copy and its settings (including your acceptance of the disclaimer), the film library copy and the films in use, and the texture, imprint, HDR and shutdown screen settings.
- The camera’s own settings, your photos and the files on the SD card are not affected.
- Turn the camera off and on afterwards. With a card holding GRLPRO.GRP inserted, pressing OK brings up the first-use guide again.
FAQ
Nothing happens when I press OK?
Check that GRLPRO.GRP is in the card’s GRLIFE folder and that you press OK on the shooting screen (with no menu or other screen open). You can also open it from GRLife Pro in the camera MENU; if “GRLife Pro shortcut” is off on the About page, OK does not open the app.
Does the SD card have to stay in?
No. Once you accept the disclaimer, the camera keeps its own copy of the app and the film library. You only need the card to update the app or the film library, or to choose a new shutdown picture.
I bought the film library. Do I pay again for 2.x?
No. The film library is activated per camera and pricing has not changed. When you upgrade, keep your own FILMS.GRF on the card instead of replacing it with the one in the ZIP.
16:9 or half frame is gone after the upgrade?
Every feature starts switched off in 2.x. Turn on what you need on the GRLife Pro Features page and it comes back to the camera menus.
What is “More films” on the Film page?
Films in the film library that are newer than the GRLife Pro app on your camera go on this shelf first. After you update GRLPRO.GRP they move to their brand’s shelf and show their full details.
Which language is the app in?
It follows the camera’s menu language: Simplified Chinese, Traditional Chinese or English. With any other menu language it is in English.
Is the GR IV supported?
Yes, in Beta: GR IV Standard and HDF on stock firmware 1.20; choose GR IV on the firmware page. Films apply to photos only; RAW development and movies don’t use films yet, and support will open once it is stable. There is no HDR photo, slider level or rear dial ISO, and no recipes.
Want to go back to v1.4x or the official firmware?
The old custom firmware page still builds v1.4x firmware. Reset the camera before flashing back the official firmware; the custom firmware guide has the steps.
Curious how this works?
The article explains where the files are made, why nothing needs to be uploaded, and the risks and limits of each path.
Read how it works →