
GRLife Pro 2.0: your GR gets its own in-camera UI, and one firmware has every feature
GRLife Pro 2.0 is a major release. For the first time your Ricoh GR III / GR IIIx has GRLife’s own in-camera UI: press OK while shooting to pick a film, set the texture and the imprint, and switch features on or off. The store no longer asks you to pick features either: one firmware has them all, and you switch them in the camera.
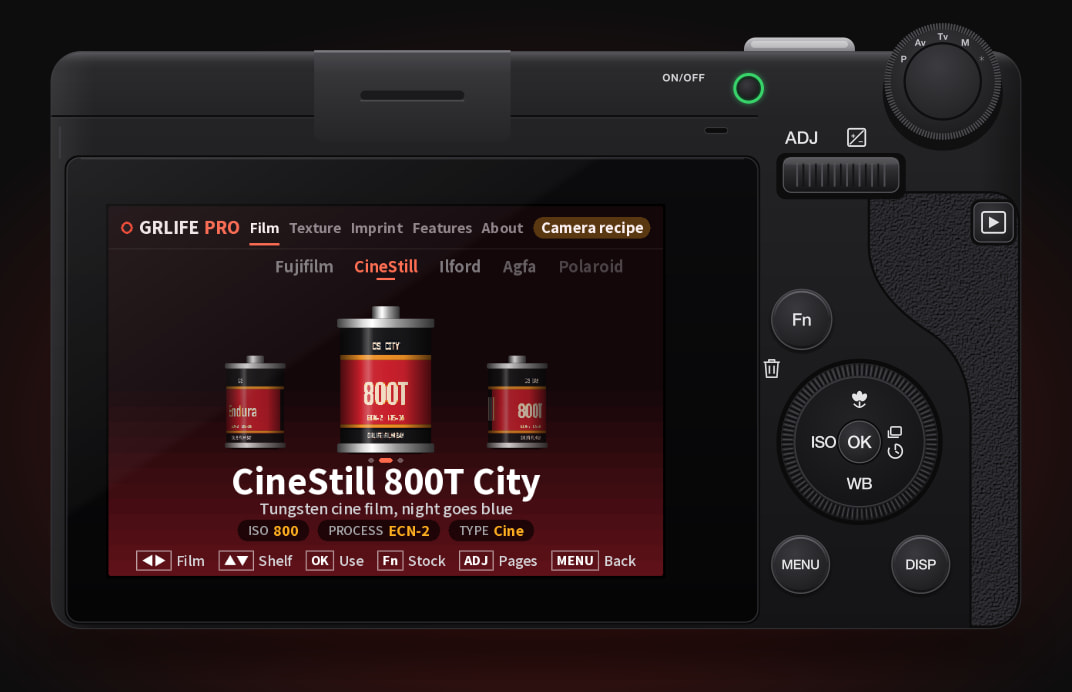
 CineStill 800T City
Five tabs
- Film: A 3D shelf of film canisters, in 13 shelves by maker, with full maker names such as CineStill 800T City and Kodak Portra 400. LUT films you imported yourself are on the My films shelf.
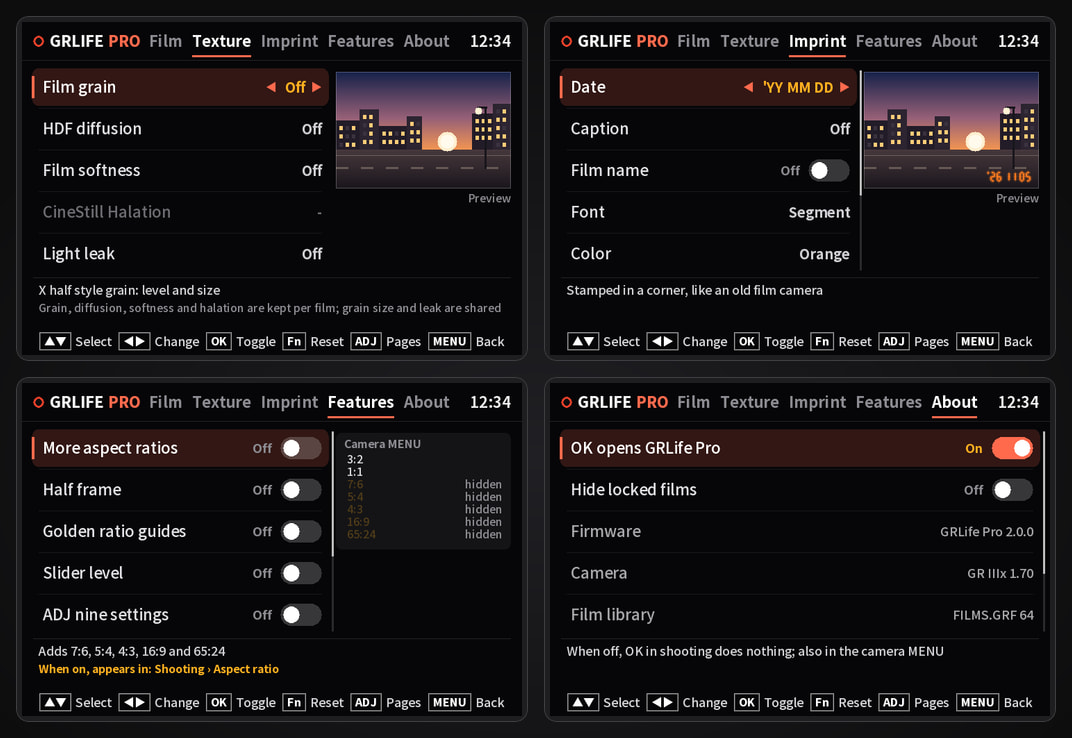
- Texture: Grain, HDF diffusion, film softness, light leaks and more, with a preview on the right. Each film keeps its own grain, diffusion, softness and halation.
- Imprint: Date, caption, film name, font and colour, also with a preview.
- Features: Every feature’s switch. The shutdown screen has its own page, where you can preview it and pick a picture from the card.
- About: Version, camera, film library, body code, and Clear GRLife data.
To open it, press OK while shooting, or go to GRLife Pro in the camera MENU. Flick ADJ left or right to change tabs; half-press the shutter to go back to shooting. The UI follows the camera’s menu language: Simplified Chinese, Traditional Chinese, or English for every other language.
The first time, a short guide shows both ways in and then asks you to read the disclaimer to the end before you can agree. Until you agree, the camera works exactly as it did from the factory.
One firmware, every feature
The store no longer asks you to pick features: there is one version, GRLife Pro 2.0, and everything you used to choose separately is built in:
- Film library: films, texture (grain, diffusion, light leaks and more), imprint
- Shutdown screen, HDR photos
- More aspect ratios, half frame
- Golden ratio guides, slider level
- ADJ nine settings, rear dial ISO
Every feature starts off; switch on what you want on the Features tab of GRLife Pro.
The app lives on the card as GRLIFE/GRLPRO.GRP. The camera keeps its own copy, so it works without the card too; when a new version of the app comes out, you usually just put the new GRLPRO.GRP on the card instead of flashing again.
Film library
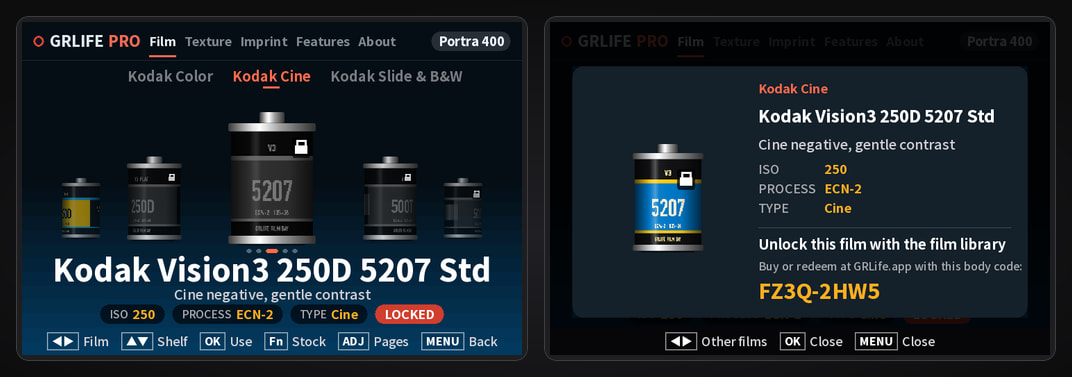
Films you have not unlocked are grey with a lock on the Film tab; press OK on one to see its info card and this camera’s body code. If you would rather not see them, turn on Hide locked films on the About tab.
If you own the GRLife Pro Film Collection, your films keep working in 2.0. Keep the FILMS.GRF already on your card; do not replace it with the FILMS.GRF in the download, which holds only the five built-in films.
Coming from v1.4x
- Features you used before, such as 16:9 or half frame, start off after the update; switch them on again on the Features tab.
- If you bought films or made your own LUT films, copy only GRLPRO.GRP into the GRLIFE folder on your card and do not replace your FILMS.GRF with the one in the download.
How to install it
- Open the GRLife Pro 2.0 store page and pick your camera: GR III (2.10 / 2.20) or GR IIIx (1.60 / 1.70). Recipes are an optional step.
- Import the official firmware, then generate and download the zip: the firmware, GRLIFE/GRLPRO.GRP, GRLIFE/FILMS.GRF with the five built-in films, and a README.
- Flash the firmware as before: the BIN goes in the root of the card; hold MENU while turning the camera on.
- Copy the whole GRLIFE folder to the root of the card; if the card already has a GRLIFE folder, copy only GRLPRO.GRP.
- Insert the card, turn the camera on, press OK while shooting, and read and accept the disclaimer.
GR IV is not supported yet. Flashing unofficial firmware carries risk; keep the official firmware so you can flash it back.
This post was first sent by email to GRLife users. To get the next one, sign in and turn on email notifications in Account settings.